
Resurrecting Dead CPS2 Game
CPS2 Game with flat battery
Recently I realised it was time to change the internal security “suicide” batteries on my collection of CPS2 games. These batteries are designed to render the game unplayable when they run down and should be replaced every few years. Here is an article I did on the CPS2 arcade system many years ago. Information on replacing the batteries. Essentially the game data on the rom chips is encrypted and a small code is needed to decrypt when the game is run. The encryption “key” is held in volatile memory powered by a 1/2 AA 3.6v battery.
With 2021 being a very busy year for me, I didn’t get round to checking my games until 2022. Before ordering a new set of batteries I decided to check that the games were operational.
Unfortunately I found my copy of X-Men Vs Street Fighter was not booting up and just showing a blank/grey screen. Looks like this battery might have died.

|

|
Upon opening the cartridge and testing the battery with a multimeter, the battery was showing a solid 0v. Happily all my other games are working fine.
Time to investigate the current solutions to dead CPS2 games.
Solutions
I was already aware that the game roms can be simply replaced with decrypted versions called “Phoenix” rom sets. The battery would no longer be needed. Personally I didn’t want to use this method as the games would be less original in my eyes.
Another option is called the CPS-2 InfiniKey board. This generic solution allows a small PCB to be soldered on the game board. The infinikey works by injecting the known decryption key into memory on start-up, allowing the original game roms to operate normally. The only problem is that the Infinikey is currently not easy to get and costs around £20.
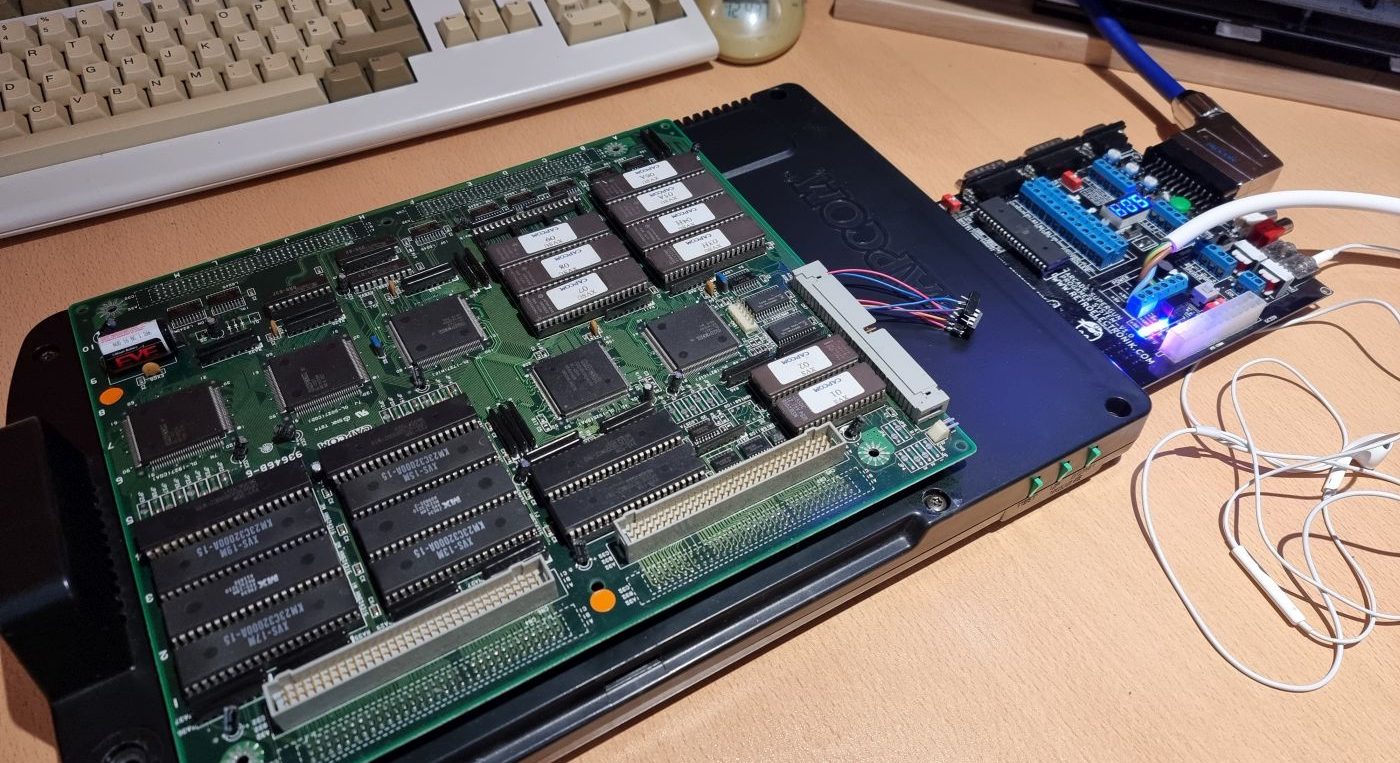
I then found this thread on Arcade-Projects.com, from the user aje-fr detailing how the to use a simple programmable pic chip to resurrect CPS2 games. aje-fr uploaded HEX files to github for each game. All that’s required is to program a PIC12F675 or PIC12F629 chip, and solder it to the required points on the game board. All details for the exact connection points are located here.
Using a PIC12F629 I already had to hand, I flashed it with the xmvsfu HEX file. First I decided to solder the chip on a socket to allow me to change the PIC code in case I selected the wrong game.
I plugged the board back onto the CPS2 motherboard and powered on. It started perfectly!

|

|
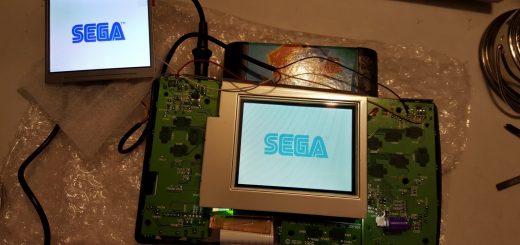
Now I removed the wires and mounted the PIC in a more permanent position.

|
I tested the game for a few minutes and all is working correctly. Batteries ordered for my other games, but if any more loose battery power in the future, at least I now know of this great solution to resurrect the game.
Neil – 8bitplus – 2022


great blog keep up the good work