
64HD N64 HDMI Mod Installation
Time for something a bit different. I know there are a lot of mods out there focusing on updating consoles to more modern TV connection standards. This isn’t something I usually keep track of for personal use, as I still use a big old CRT for everything retro game related. On the other hand I can see that people want to bring retro gaming to the living room TV in a more convenient way, and HDMI mods can accomplish this.
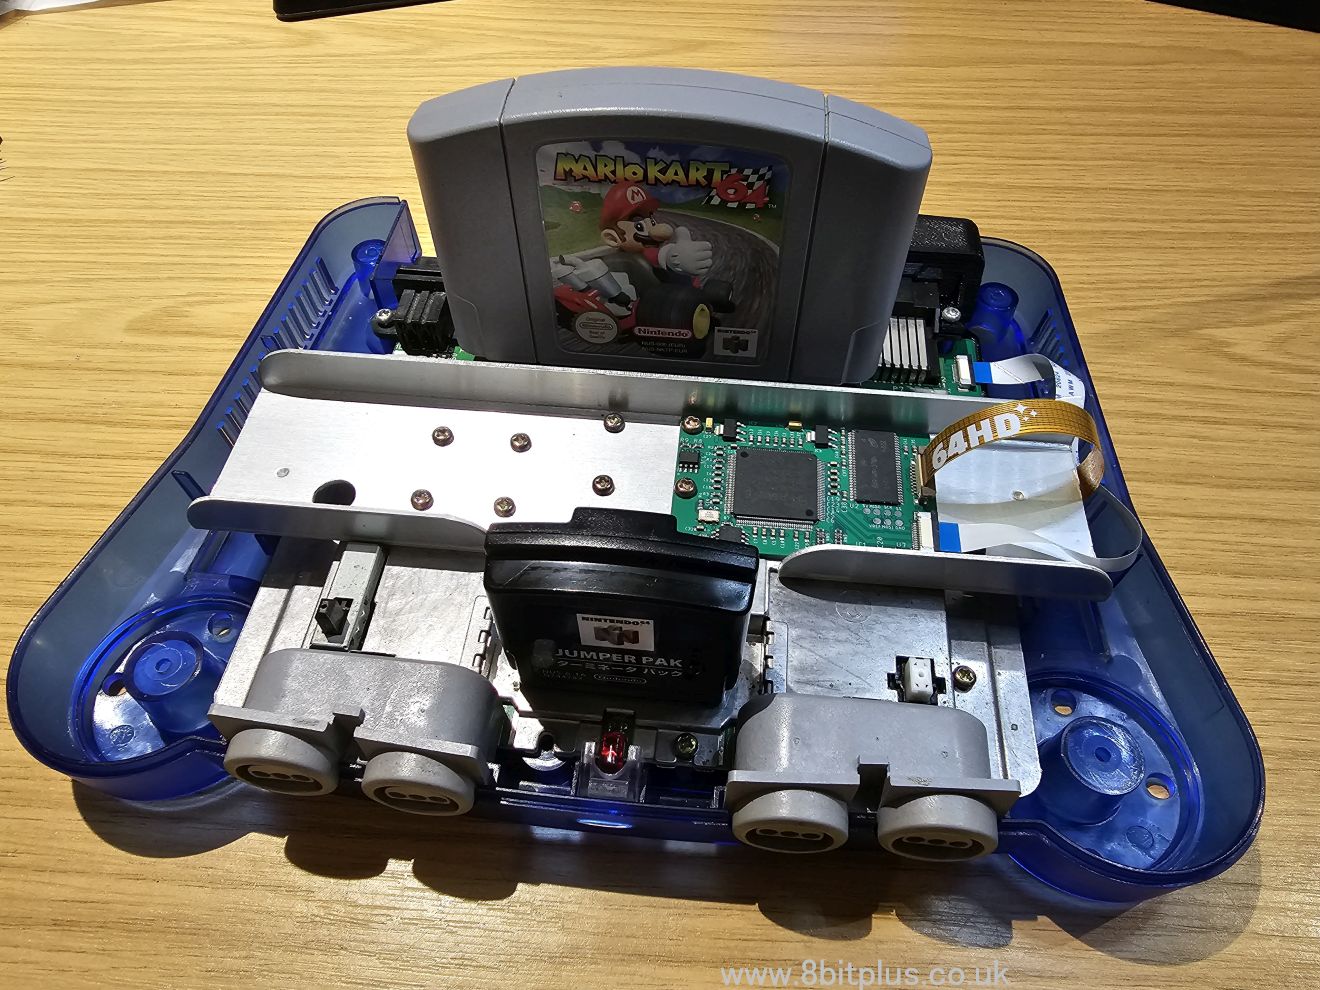
I was asked to install the new GameBox 64HD HDMI mod in a customers PAL 64. He had already treated himself to a very nice transparent blue case from Aliexpress. I was sceptical until I saw it, but it does look very nice really. The mod involves soldering a flexi ribbon directly to the consoles main video IC. It taps the singles needed to generate a pure digital image for upscaling.
The solder points are very small and this mod is not recommended for beginners. It could even prove challenging to most people familiar with a soldering iron.
Inspection and Dismantling

|

|
When the console arrived in its shiny blue case, the first task was to check it was working. I believe the owner was unable to do this before sending. All worked perfectly on my TV with the standard composite cables. I then proceeded to dismantle the console and remove the motherboard. Why on earth did Nintendo use so many screws!
64HD Installation
|
|

|

|
With the board removed I started firstly with the main flexy connector. Instructions provided online show where and how to line it up. When aligned currently I used Kapton tape to hold it in place. Using a fine solder tip and my trusty soldering station I bridged the connections between the pins and the cable. Only a very small amount of solder is needed and plenty of liquid flux. A connection is also soldered to a nearby VR for power. The results are very pleasing. The next part of the job involves installing the HDMI port board with the provided 3D printed case parts, and connecting the ribbon cable.
Wires are also connected to the controller chip to allow for menu navigation.

|

|
Now the board is back in the case and heatsink and RF shielding back in place. Flexy cables are then linked to the 64HD main mod board installed on the heatsink. Don’t worry, the heatsink doesn’t get too hot in operation. Ready to test
Testing and Conclusion

|

|

|
After I found a mini HDMI adapter I tested the 64HD out on my PC monitor. I got an image straight away. The 64HD menu allows for a few different resolutions, I found 720p to look the best on this display. You can also adjust brightness and enable filters, scanlines and even du-blur as you like. I couldn’t enable the 1080i option on any of the displays I tested with, this is more for HDTV’s. The picture was very good, and no detectable latency as far as I can tell.
After a few rounds of Mario Kart 64 I was happy with the mod, and got it ready to return to the customer.
Please contact me if you require this mod installing in your N64.
8bitplus – 2023
Thank you so much again for doing this for me! Just to clarify this was an N64 I got off Ebay which was listed as faulty for the AV out but upon trying it out it seemed to work without a problem with my own official cables etc so I’m not sure what was meant to be wrong with it when the original seller had it.
Also I think there’s a general problem with the 1080i resolution, my HDTV didn’t work either and I tested using the Genki ShadowCast which is a small USB-C capture dongle via my PC. Other than that though that was no big deal, the other resolutions are perfect enough for it.
But overall definitely worth it, I was previously using a RetroTink Mini which doesn’t justify the resolution, it just makes it so muggy. Now it makes everything so much easier to view. Thank you again!