
Creating custom RetroPie emulation consoles based around the Raspberry Pi, RetroFlag cases and controllers. installation and tweaking EmulationStation.
With all my game collection, tool and most of my equipment packed up for the move (see here for details), I’ve been looking for an easy project to keep me busy. Something that doesn’t involve soldering for once.
I recently found out about the RetroFlag line of retro console inspired cases for the Raspberry Pi. Some while back I started looking into RetroPie for a friend, so I decided to build a couple of emulation machines for the living room. One based on the Megadrive case, and the other Nintendo SNES case.
MegaPi case
This was the first case I got and I was very surprised with both the quality and presentation of this product. This case is compatible with Raspberry Pi 2B / 3B / 3B+.

|

|
As you can seem the design is based on the Asian region Megadrive model 1 console (like this one in my collection). I’d of liked the option to get the case in the European trim, but this is very good anyway. The level of detail is very good and so are the materials used. It feels nice to hold and no cheap or something that feels like it will brake easily. As mentioned on the front of the box, these Retroflag cases feature working power and reset buttons. When switching off the Raspberry Pi is signalled to run a safe shutdown script and not just disconnect the power. this prevents corruption of the SD card file system.

|

|

|
The front controller ports are USB and located in the correct positions. Around the back, we can see cutouts for the power, HDMI and audio output from the Raspberry Pi board. Additional USB and Ethernet ports can be access by removing a small panel on the lower side corner. The SD card can also be removed without dismantling the case by opening another side panel. Finally the cartridge slot can be opened by pressing the volume slider, this compartment is great for holding extra SD cards or USB dongles if needed.
Assembly is very straight forward and needs only the supplied screw driver. Instructions are given showing the orientation the Raspberry Pi board and the connection of the GPIO connector. A 30mm fan can also be installed.

|

|

|
SuperPi Case

|

|

|
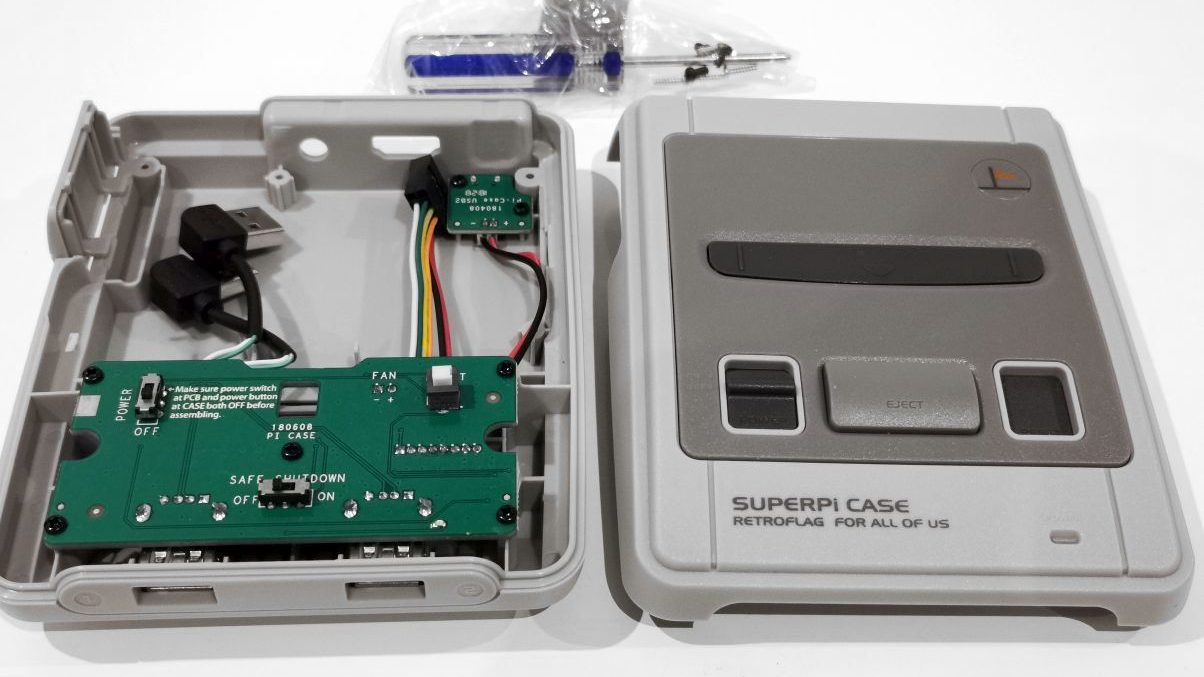
Just like the MegaPi, the Retroflag SuperPi gets all the important details right. Its a very accurate mini clone of the Super Nintendo, and with a good materials and build quality. Again its is compatible with the Raspberry pi 2B through to 3B+, and features the same safe shutdown switch and reset system as the MegaPi.

|

|
USB and Ethernet ports are accessible by the removable side panel. SD card is located on the right side. Pressing the Eject button opens the cartridge port to reveal the storage compartment within. This space is smaller than the MegaPi, but still enough for spare SD cards.

|

|

|
Installation was a little harder than the MegaPi due to the smaller size of the case. The GPIO connector only just had enough clearance with the case moulding for the cartridge slot compartment taking up the space above the board.
RetroPie
With the Raspberry Pi’s installed in the cases, it was time to get the software working. RetroPie had come along a long way from when last looked at it. I found the process very easy to get it working on each system. Its best to start with the prepackaged RetroPie images from their website rather that installing on top of the Raspbian OS, but that can be done if you already have a multi use Raspberry Pi setup.
Download the latest RetroPie build for your selected Raspberry pi from here. Write the image to a good quality SD card with something like Belena Etcher. Insert SD card into a Raspberry Pi and it should boot up a working instillation of RetroPie.

|

|

|
Out of the box the EmulationStation is a bit bland looking, but can be skinned and themed to your liking later. The first task for most people is to transfer all the ROMs over. RetroPie offers several methods of doing this, but by far the easiest was to connect the Raspberry Pi to a wired Ethernet connection and browse your network for the samba share. With a Windows computer on the same network, just type //RETROPIE in windows file explorer to open the share location on the Pi.
Transferring large amounts of files can take a long time. The Raspberry Pi 3B+ is fastest in this department as it has Gigabit Ethernet.
Scraper
Next task was to gather all the screenshot, box art and other metadata for each gave. Thankfully this can be done automatically with a process called scraping. The default scrapers that came with the ElulationStation front-end are next to useless for large game collections. I found the best solution was to install the SkyScraper package by muldjord. This is located on the RetroPie-Setup menu, under Experimental packages. I highly recommend familiarising yourself with its use before hand as its highly flexable and you may want to configure its output for your desired theme.

|
For mysetup I wanted a combined image with a screenshot and the game box-art viable in the same image.
Front end themes
As mentioned, the default themes bundled with RetroPie are a bit generic although perfectly useful. I wanted each unit to have a unique look that represented the Sega and Nintendo games. For the Nintendo unit I found this theme (Located here) based on the SNES. Its fairly customizable and I found it looks perfect for what I want.

|

|
|

|

|

|
As for the Sega unit, I found it harder to locate a perfect theme. While searching I did manage to find a theme (located here) that was close to what I wanted, but would need a few tweaks. Editing themes in Emulationstation is quite easy and a only uses XML files. Emulationstation also have some great documentation regarding how the theme system works and how to make your own if you wish.

|

|
|

|

|

|
Some of the changes I made were to the system icons and game list. I wanted a larger game list that could show more titles on one screen. Metadata was not used either so I enlarged the window and made changes to the theme XML files to display the game information. I’m very happy with how it looks now.
Retroflag Controls
RetroPie supports a wide range of controllers. Both USB and bluetooth, as well as controllers with wifi dongles. I decided to get a couple of matching USB wired controllers from Retroflag to go with my setups.

|

|

|
Firstly we have the Retroflag branded Megadrive style pad. It has the original 6 button layout with the addition of 2 microswitch shoulder buttons. Also present is a select button which can be assigned to additional functions. The controller feels very good and responds well. The direction pad is just about right and not loose or spongy. Its advertised as being also comparable with Windows and Nintendo Switch.

|

|

|
Next is the Retroflag SNES style controller. again this controller is very impressive and almost an exact clone of the pads included with the Nintendo SNES Mini console. the action buttons have a nice gloss finish and the controller overall is very nice to use.
I also found that my 8BitDo Bluetooth controller works perfectly too. This became my preferred controller for the Sega Setup after a couple of days. Bluetooth controllers are very responsive and didn’t produce enough latency to spoil the game play for me. While looking for a Bluetooth controller for the Nintendo unit, I found the 8BitDo SN30 Pro controller for sale in a local shop. Apart from the inclusion of dual analogue sticks, its a good match for all the Nintendo games, as well as Switch use.
So that’s about all for now. I will be flowing Retroflag closely in the future and will be building more mini consoles at some point. No I have some way to play my favourite Sega and Nintendo games over Christmas.
If you have any question about these units please ask 🙂
Neil – 8bitplus – 2019
Hallo, ich habe eine Retroflag im superpi gehäuse. Bei mir scheint die platine an denen ich die Controller anschließe kann, einen Schaden beim Safe Shutdown zu haben. Zumindest sind die Lötstellen farblich verändert. Weißt Du ob ich diese Platine einzeln erhalten kann oder nur mit dem Gehäuse?