
Lets talk about Capacitors
I’ve worked on many consoles and computers affected by bad capacitors. So here is a short article about what can happen, how to spot problems, and what can be done to fix them.
If you have looked at a computer or console board you’ll have seen them. The barrel shaped things dotted around the board or clustered together. Most of the time they do their job very well, but after many years things start going wrong.
")
|
Firstly I don’t want to alarm anyone. Not all consoles are affected by bad capacitors. I find some are more likely to have problems, some almost never have problems. Then there are the consoles that absolutely should have all the capacitors replaced ASAP. the only worrying thing is that computers and consoles with bad caps can continue working fine for a long time until running into AV or stability issues.
Worst offenders seen by myself.
- NEC PC engine DUO
- Sega CD1 or Mega CD1
- Sega Game Gear
- NEC PC engine (GT handheld or LT)
- Amiga 4000/1200/600
- Amiga CD32
Other less common cases
- Microsoft Xbox (original black console, some revisions)
- Panasonic 3DO
- Jamma boards (usually clones with cheap parts)
- Sega CD2 or Mega CD2
- Amiga 500/500+
What causes a cap to go bad?
Its hard to fully answer this. Not all capacitors go bad, even ones 30 years old may be just fine. Some problems may be related to heat. Perhaps caps are located too close to a heat source and not rated for the correct temperature. Some may be from cheap stock and selected to save the manufacture money. This practice is common and seen everywhere sadly. Lastly, in the case of the Amiga CD32, the cap may be just installed backwards!
The rating and workload of a capacitor is an important factor too, and can sometimes be a factor in cost-cutting for the manufactures. If a circuit is requiring a capacitor to provide 220µf (rating of capacity) at say 16v maximum, a 16v capacitor may be selected. it will provide a steady 220µf up to 16v in operation as needed, but not for as longer life span as a 25v cap.
The reason for not using a 25v capacitor in the first place is cost. The difference is only going to be a couple of pence/cents but when ordering 100,000+ of these things it soon becomes expensive. So the lowest value possible is usually selected.

|
")
|
What happens when capacitors go bad?
Firstly nothing for a long time. This makes early diagnosis hard as the console/computer may just continue to operate without symptoms for a very long time. When they got to a certain point the capacities values of the capacitors are no longer correct and we start to find problems with sound/video or crashing and restarting.
Next the cap may start to leak, spilling corrosive chemicals slowly over the board. Damage to all areas around the affected cap is caused, and this accelerates damage to other caps too. Copper tracks in the PCB can be destroyed and and voltage, signal or ground they carry will not make it to other component as intended. Smaller components situated in the affected area can be shorted out when the electrolytic fluid finds it way under or around them.
")
|
")
|
")
|
Early surface mounted capacitors are particularity nasty. As they are in close contact with the PCB there for preventing some of the fluid from evaporating quicker.
Early symptoms with affected consoles could be a drop in volume to your TV. you may find yourself turning the volume higher and higher to play. Sound may cut out altogether when the console is warmed up. your console may crash or hang more often. If the Caps regulating voltage to the CPU become affected then stability will always be compromised.
Spotting bad caps
Through Hole type. Thankfully I have yet to encounter a through hole cap that managed to leak so bad that it caused damage, but it can happen. The first sign one might be going down the road to the dark side is doming on the normally flat top. Next, if left unchecked, the “vents” on top will widen and leak. This leakage is often very fast drying and turns to a crusty brown or orange powder. Best not to let things get advance that far. If the top isn’t flat, change. Typically the cap stops working correctly at the doming stage, and you find problems with devices not powering on or crashing frequently with PC’s.

|

|
Surface Mount type (SMD) Now this is where things get messy, literately. The SMD type cap will look unchanged until it leaks out everywhere. Worse yet they continue to work (just not as well) while at the leaking stage, spreading the damage around the board before being spotted. You might spot that the solder joint on the affected cap can look grey and not reflective. This is because the solder is starting to react with the leaking electrolytic fluid and becoming oxidized. When SMD caps leak the fluid takes a very long time to evaporate. The fluid can be passed from one side of the board through the tiny via holes. I’ve seen this with PC Engine Duo consoles many times.
")
|

|

|
Replace and Repair
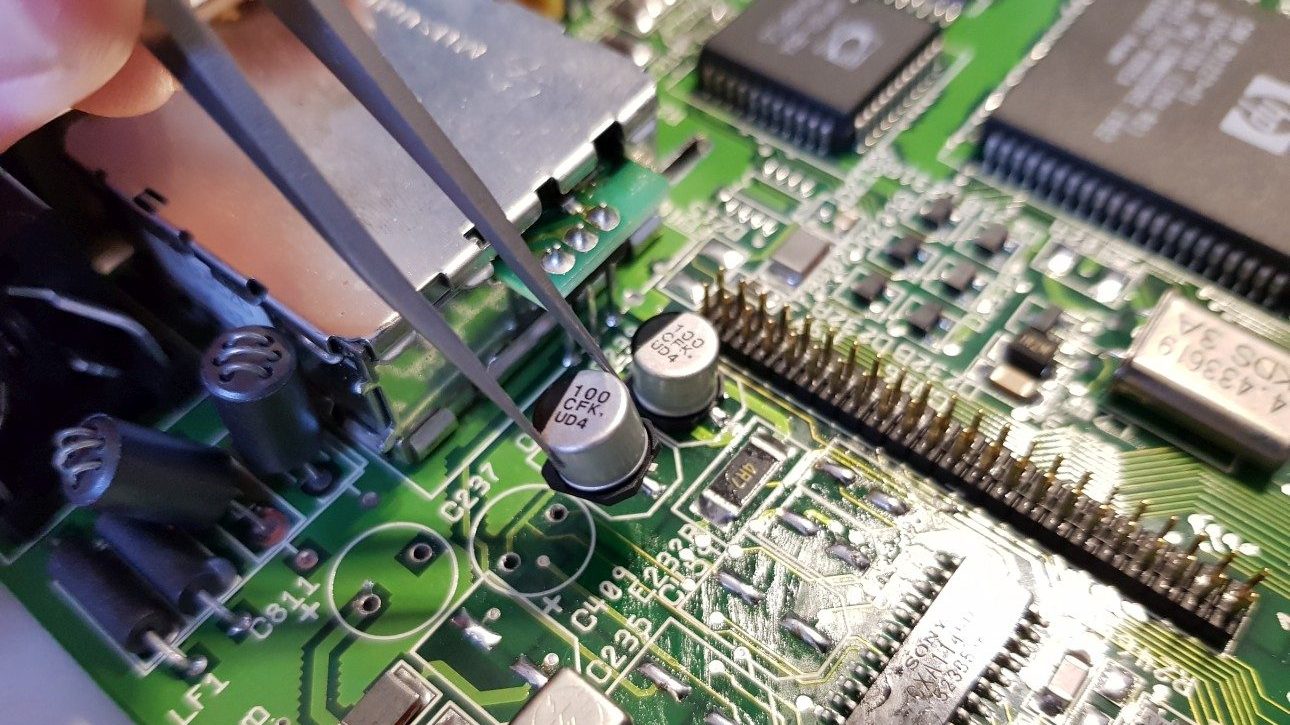
When identified as problematic the first thing to do is remove the capacitor. Bear in mind that the area connecting the cap to the PCB can be damaged or wakened. If the cap is surface mounted then the pads underneath can be weak and my be easily pulled off if removal is too heavy handed, or may lift if too much heat is applied. You will probably notice a “fishy” smell while soldering components affected by leaked fluid.
The best method I found is to introduce a small amount of liquid flux to the compromised solder. Hopefully when heated it should melt the solder faster and with less heat contact.
With the cap removed any leakage needs to be cleaned up. For this I use PCB cleaning fluid and cotton swabs. In extreme cases washing the board in de-ionized or distilled water will help to neutralize the acid. It will also cleanup any muck and grease stuck in the leakage.
Solder wick (or braid) works well to remove old solder from pads. Applied with a little more flux and sometimes even very bad looking pads can shine up a treat.
")
|
")
|

|
If a track is broken or pad eroded so badly that its no longer conductive, then the board needs repairs. This can be simple as using a small wire to bypass the faulty track.
Its always best to replace with cap that are rated at higher voltages and temperatures than the originals. If the capacitor is going to be located close to a power supply or voltage converter, then i’d recommend using 105° if possible. Also remember to check if caps near power supplies or converters as they may need special Low-ESR rated caps.
Get help
Replacing caps can be straight forward, or a real nightmare. If it looks out of your depth then find someone with experience to take it on. Also the last thing I’d like to say is Don’t leave it or do nothing! If your console is affected. Its not a problem that tends to go away, and certainly will get worse.
If you need help with capacitor replacement, please contact me here.
Thanks for reading.
8bitplus 2017
Console5 is a good choice when looking for complete Capacitor Kits.
Great article