
Installing and testing the Unibios in my 1 slot Neo-Geo MV-1B arcade board. Removing old Bios and installing new socket and bios Unibios chip.
The Neo-Geo MV-1B and Universe Bios
The Neo-Geo one slot version MV-1B is one of the smallest Neo-Geo board released by SNK. Early single game units like the MV-1 had a much larger footprint, needing almost the same space in an arcade cab as the 4 or 6 slot variations. For smaller cabinets or home use with a supergun, the MV-1B or 1C is perfect. They also use the Jamma connection standard rather than MVS, although Jamma only gives you mono sound.
My goal was to create a small supergun docking station for the Neo MV-1B (so as not to damage the original case). I also wanted to install an upgraded BIOS known as the Universe BIOS to enhance the system. I decided to start with this first while still looking for a few parts for my supergun build.
The Universe Bios is a project by skilled Neo-Geo enthusiast Razoola. It is a full replacement to the original bios and brings a huge list of features to the MVS, AES or CD systems.
MV-1B Installation
Firstly I dismantled the MV-1B. just remove the 4 screws in the base and the boards pull away from the case. The two PCB are connected with right-angle connectors and easily separated.
")
|
Next I identified and removed the original BIOS chip. Damage can happen when overheating solder pads, care must be taken when doing this.
New solder is added to each pad ready to receive the connecting wires.
")
|
")
|
Now I cut, prepared and tinned 40 individual lengths of Kaynar wire to link the new BIOS to the solder pads. The 40pin EPROM chip will sit in a socket mounted on a small section of Veroboard. Obviously I needed to cut the underside of the board to separate the connection lines. The chip could be soldered directly, but a socket allows for easy updating the BIOS in the future.
")
|
")
|
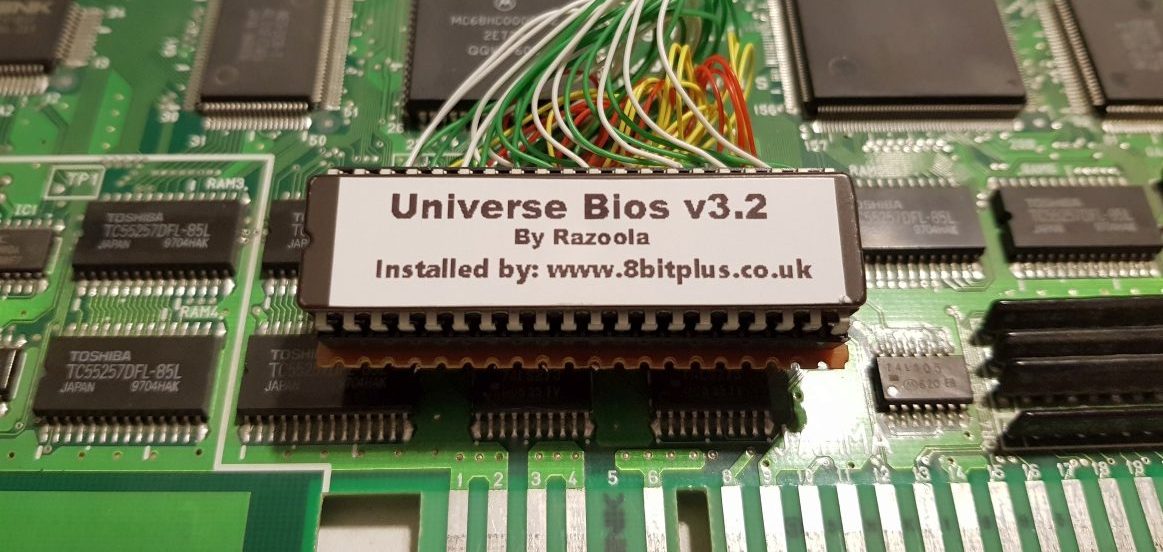
Now finally the wires are soldered to the BIOS board and we are ready for testing.
")
|
")
|
Testing
Looks like everything went perfectly! Upon powering up the board I was greeted with the UniBios startup screen. Here we can select the main region and game-play types. You can either select home AES or Arcade MVS mode too.
")
|
")
|
I tested it with a full play-through of Kibiki Clash followed by a good blast of Metal Slug.
So there we have a textbook install with no surprises or problems. Now I can proceed to build my custom supergun for the MV-1B. More updates on that later.
I recently posted that 8bitplus.co.uk is now an official 3rd party installer of the Unibios.
If you have any Neo-Geo system and would like an installation of the Universe Bios, please get in contact with me.
8bitplus 2017.
Recent Comments