
Putting together the ultimate Sega Saturn setup. selecting components and modifying a stock Saturn to make the prefect gaming setup.
I still love the Sega Saturn…
I was a total Sega fanboy back in the 90s… Wow I sound so old now… From the first time playing a Game Gear, it was all about SEGA for me. Other system were alright, I knew plenty of kids with Nintendo’s and that was fine. I dabbled with other consoles too, I had a NES, SNES and various Amiga setups, but it was Sega that gave me the most fun.

|

|

|
So obviously when the 32bit generation came around the Sega Saturn was my choice of platform over the PlayStation. To me it was a real Next Gen system over the MegaDrive/MegaCD/32X setup I was using at the time. Graphics and sound were amazing, even the look of the original PAL black console looked so cool. I stuck with it loyally through to its last releases and never regretted the decisions, and never will. I loved playing the Sega arcade games at home. Sega Rally, Daytona and Virtua Cop to name just a few. Then later titles Nights and Burning Rangers showed when the console was really capable of.

|

|
As time went on I opened my tastes for games to cover many different platforms. Including the rivals Nintendo and Sony, and I’ve honestly enjoyed and loved games on them too. I now collect for all consoles, not just Sega. But a Sega fanboy I will always remain deep down.

|

|

|
Only in the years after Sega left the console business I could afford to start collecting Saturn games from Japan that went under my radar, or never saw a release in the UK. I still love discovering great games I’ve not tried before. Sega Saturn is still my favourite console ever.
Plan
Now with release of CD drive replacement using SD cards, and the soon to be launched Satiatior cartridge which will allow for USB HDD loading, the format is back in the attention of the retro gaming community. Saturn becoming easier to use without the original CD’s or burning backups.
I decided to take a stock Saturn and make the best possible example I could, and be ready for the Satiatior cartridge when its released. Here’s what I plan to do:
- Select a stock Sega Saturn. Clean and service the unit if needed.
- Replace motherboard capacitors.
- Install modchip for CDR playback.
- Region Free BIOS Installation.
- Switchless 50/60Hz selector.
- Replace Save SRAM chip with FRAM (so save data will never be lost).
The Saturn
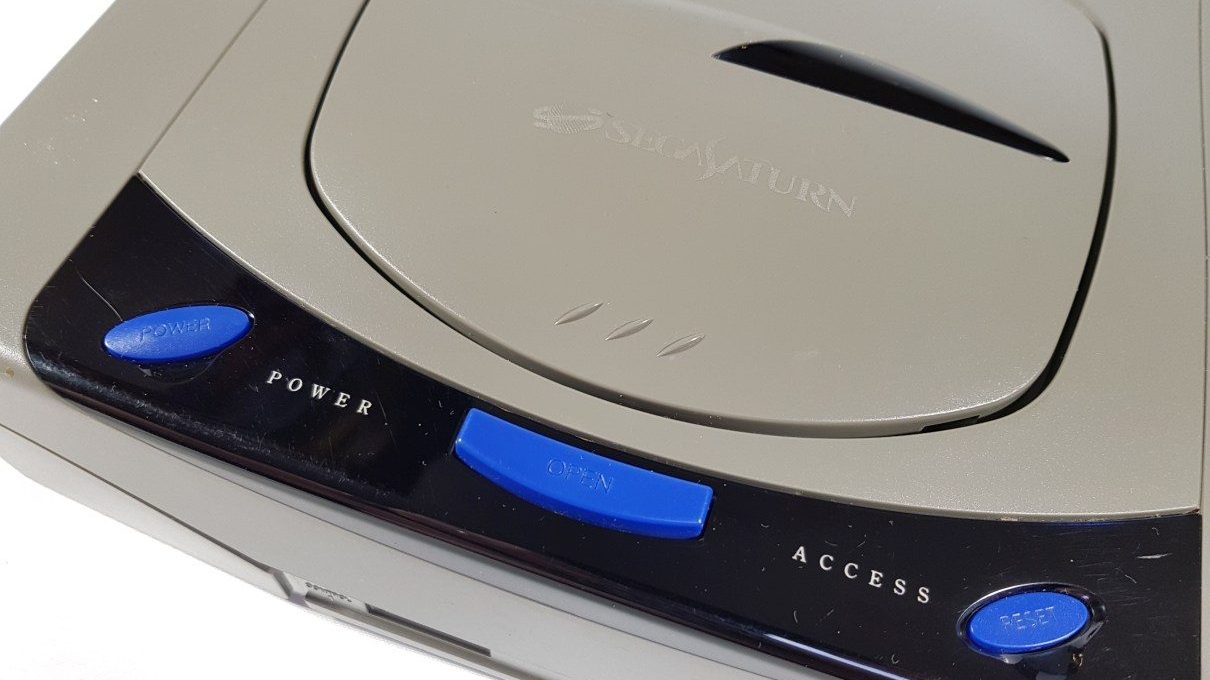
To start things off I selected an original Japanese launch version of the Sega Saturn, model HTS-3200. Its slightly more exotic looking than the PAL back units, and more interesting to look at than the HST-3220 (version 2) units. The version 1 Saturn’s all look better to me, with a more detailed, aggressive styling that looks very high end. The blue buttons really stand out between the black and grey.
")
|
")
|
")
|
This Sega Saturn is now almost 25 years old! and still working. Lets take a look inside.
")
|
")
|
")
|
Its in better condition than I expected. Sometimes the RF shield can have a few rusty spots, but in this case everything looks to be in good order. The original Saturn has a few differences to the later models. The PSU is located in the lid, and the internal expansion card slot is located on a smaller secondary board. There are some other cosmetic differences too. The power and access LED’s are both dual LED’s. The case seems to have ventilation holes and holder for an internal fan. I may try adding one later.
Replace Capacitors
Although the Sega Saturn is not known to suffer problems with leaking capacitors, at least in my experience. They are now almost 25 years old and due to be replaced. The HTS-3200 Saturn is a bit tricky to dismantle but eventually after a full strip-down I freed the motherboard.
")
|
")
|
")
|
You can see here how many parts go into the Saturn.
")
|
You can see the motherboard has surface mounted capacitors mostly, and a couple of larger radial caps near the connector for the PSU. The PSU has several high voltage and capacity caps. These can be changed as well but can be harder to find the replacement parts.

|
I started with the motherboard and removed all the original caps. I then cleaned and prepped the solder points for the new ones. As I’m replacing SMD caps with radial ones, care needs to be taken when placing the caps as the height is limited. There’s also a few caps on the CD-Rom board that should be replaced too.

|

|

|
Modchip
In order to play games on CD-R a modchip needs to be installed. The Modchip help bypass the detection mechanism that checks if the CD is an original milled one, and skips straight to loading the data. Several people have produced the modchips for Sega Saturn. RobWebb and Racketboy both produced mod chips in the past, but they are no longer in production.
The main thing to know when sectioning a modchip is what type of connection your Saturn’s CD-Rom drive uses. Older Saturns use a 20-pin cable. The later units use a 21-pin cable.
I recommend a universal chip called the Phantom, which can be purchased directly from RetroGamerStuff.com. After installing this modchip in dozens of Saturns, I’ve never had any issues and it works well with either 20 or 21 pin console drives. Inaltion is very easy, but does need soldering. The modchip needs a 5v power connection. This can be taken from many places on the motherboard, but the most comon connection points are under the PSU connection prongs, or a veryusefull point on the CD-Rom driver board. Both are highlited in the installation guid for the Pahntom. Another solder point is on the modchip its self to select the drive settinng. Again this is covered in the manual.
")
|
")
|
")
|
Now reassembled, my Saturn can read and play CD-R games perfectly. Make sure to use a good quality CDR brand.
Region Free Bios
This is where I had to start considering options…
The Sega Saturn is region locked with its bios, but also with the jumpers on the under side of the board. Changing the jumpers allows booting either PAL, US or JAP games, but you can also replace the bios with a region free one that will do the same thing. The dilemma is that the region free bios wont change the video frequency, that needs to be done on the jumpers with a switch or switchless system. I decided to go ahead and install the region free BIOS as this is quite easy on the VA0 motherboard.
Here I have located the large bios chip at the front of the motherboard, its hard to miss. I removed it quickly with my desoldering gun.

|

|

|
Next I installed a socket and programmed a spare EPROM 27c400 chip with the region free bios. I went with the region free Japanese image to keep the JAP intro and sounds. This does of course leave all the menus in Japanese, but Its not hard to navigate. Anyway I’ll be using the action replay to manage save data.

|

|
Now my Saturn can run all region games, even my PAL games which half my collection consists of. That brings us to the next issue to resolve….
Switchless 50/60Hz Selection
With the region free bios in place and all games booting (without the need for the Action Replay card) we have the console still set to 60Hz. A small number of PAL games which have been optimised to work properly at 50Hz can have problems in 60Hz. These include graphic issues, overscan, speed and other corruptions. Only a few PAL games are problematic at 60Hz but the list includes some big titles. Full list located here.
We need to have the option to switch back to 50Hz when needed. This is easily done with a switch but I want to keep the console looking 100% stock and not have a switch sticking out anywhere. The solution is a modified version of SEB’s original code is available on mmmonkey’s site that only cycles the selection of video frequency and not console region.
Normally the method of selecting the video signal is to wire up the switchless mod to JP1 and JP2 on the underside of the board but this didn’t work for me. After some testing and a little help I found the only way to switch signals was to lift pin79 of the 315-5964 chip. I wired this pin to the programmed 16F630 controller chip.
")
|
")
|
I replaced the green power LED’s with bi-colour red/green ones, and again linked them to the micro controller. Its also linked to the reset button and reset data line.
")
|
")
|
When the reset button is held down, the LED switches between RED for NTSC and GREEN for PAL. When the button is released the Saturn switches video frequency.
Now those opitomised PAL game play fine when selecting 50Hz. Whats next…..
Replace Sega Saturn Save RAM Chip
Ok this is a bit excessive, but I changed the save game SRAM with a replacement FRAM chip. The replacement RAM does not need battery power to keep the save data. One of the biggest unresolved problems with the Sega Saturn is that ts RTC circuit eats batteries. Even a fresh one will go flat in a few of months. When this happens you will also loose the save games in the memory as well as time settings. with FRAM this should never happen again! Initial idea from here.
This is the original SRAM chip, I removed it with hot air.

|

|

|
Once the area has been cleaned the replacement FM1808 can be soldered straight in except pin 22 which needs lifting and wiring to ground

|

|

|
You can also cut the power to the save ram from the battery and it might make the battery last a little bit longer. But at least when the battery dies, your save game data wont go with it. So there we have a Saturn that can hold it’s Internal save game data for over 45 years. Long enough I’d say.
Essential Accessories
A good quality RGB scart cable is a must have. the Saturn does have very good composite output (one of the best I’ve ever seen) but RGB is still the best standard for retro games.
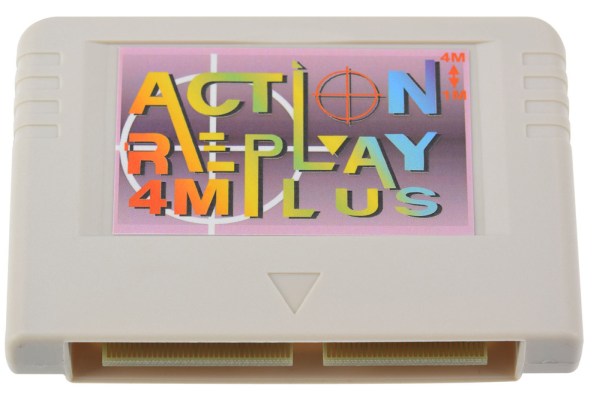
The other recommendation from me is the Arction Replay 4-in-1 plus. This cartridge combines a save game expansion and the system RAM upgrade for the games that make use of it. No need to keep swapping cartridges.
Done for now
Well I think that’s all I can do for now. I just need to wait for the Satiator card to get finished, released and hopfully I should be able to own one one-day. Then I will have the perfect Saturn setup.
Until then I can sit back and play my original and backup disks.
8bitplus – 2018
Recent Comments