
Replacing the internal IDE hard drive in a fat PS2 with a newer SATA drive. Replacing the IDE connector in the Sony network adaptor. Upgrading, setting up and installing games for OPL or HDLoader.
PlayStation IDE Adapter
As you may or may not know, the original “fat” PS2 can be fitted with an internal IDE hard drive. All that needed is the Sony Network adaptor with IDE support. Originally this device was designed for games like Final Fantasy XI, where the game would install files to speed up load times. Similar to how xBox did. In fact quite a large number of games support this feature in Japan. Network support was also added for these titles.
")
|

|

|
Later hackers found ways to install and play any game ISO from the HDD using special programs and modifications. Currently the most common method of doing this is by using a softmod called FreeMcBoot on a memory card. Then loading a program called OPL (Open PS2 Loader). OPL can load ISOs from USB, HDD and Network.
IDE to SATA Upgrade
I have been using a IDE HDD in my PS2 for a long time, and recently started to notice a few problems starting to develop. Sometimes the drive will not always spin-up, and then started to sound louder than normal. Fearing that the drive may be failing I decided to replace the HDD. I wanted to install a newer SATA drive in my PS2 this time.

|

|
You have a few options to get SATA working on the PS2. I went with the option to upgrade the Network adaptor by replacing the IDE PCB with a specially designed SATA controller card I found on eBay. Link here.
The upgrade it’s self was quite straight forward, All you need to do is dismantle the network adaptor, disconnect the IDE PCB and the Molex power connector.

|

|
")
|
Then install the new controller card with its supplied ribbon cable, and connect the original power cable back up. The SATA adaptor also comes with small plastic spacers to align the SATA port to the right position.
")
|
")
|
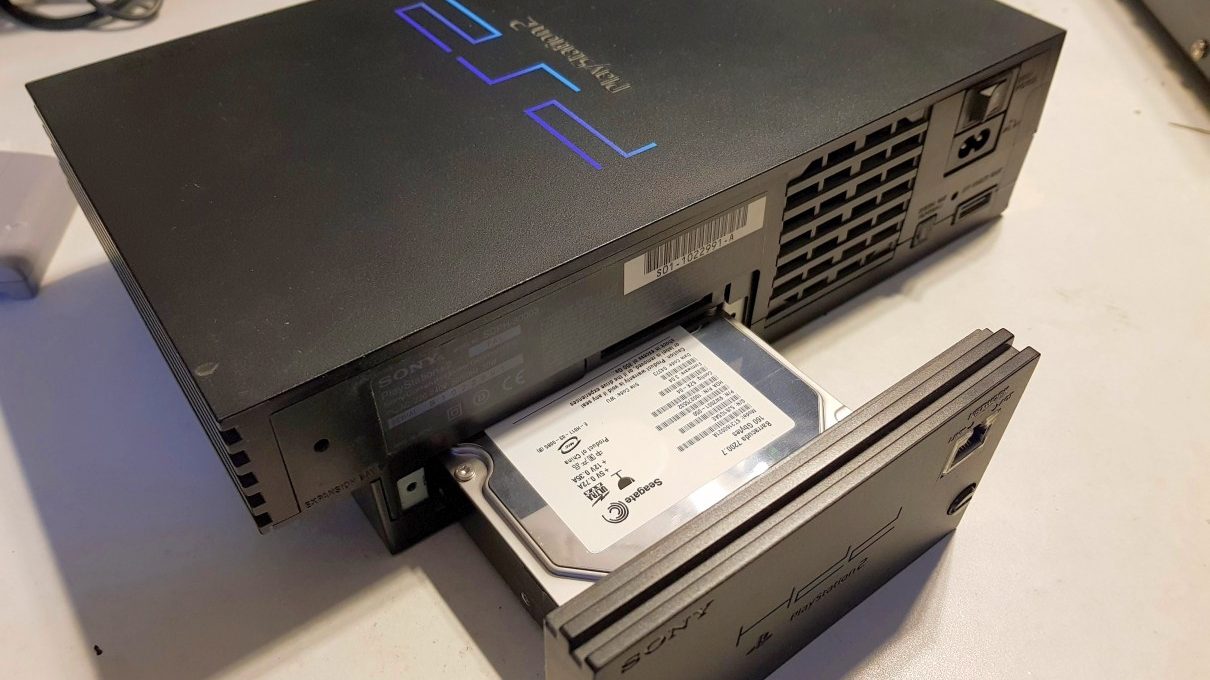
Now just reassemble and connect either a 3.5″ or 2.5″ HDD. I’m using a Hitachi 160GB SATA drive for testing just now before I purchase a 1TB drive soon.
Partition and Setup
Now to get the drive ready for use with OPL. This section assumes you have a working FreeMcBoot card.
- When the new drive is installed and you have booted your PS2, Select and run uLaunchELF.

|

|

|
- From there browse to the “MISC” folder and launch HDDManager.
- HDD manager should detect your new drive and show that its not formatted. Just press R1 to open the menu and select format.
- Now as you can see above the drive is detected and formatted. The correct size is also shown.
- Next Reset your PS2 and load OPL.

|
no images were found |
When you load the program for the first time OPL created a partition for its self on the HDD. This partition contains information on the game configurations, settings, optional OPL themes and game artwork. By default this partition is only 128mb in size. I recommend resizing this of you want to install artwork, screenshots and OPL themes.

|
- Reset your PS2 and head back to uLaunchELF and its HDDManager.
- Now you should see the partition titled “+OPL”.
- Highlight this partition and press R1 to open the menu, then select Resize.
You can select any size, but for this test drive I selected 2Gb.
Great, Now we have a formatted SATA drive and a partition for OPL ready for games.
Game Installation
I was luckily able to save all my ISOs from the old failing IDE drive using a USB to IDE adapter. The method of transferring the game is exactly the same as it was for the IDE drive. You can either connect the PS2 hdd to a PC/laptop and transfer the ISO’s directly, or over LAN if your HDD adaptor had an Ethernet port. You can still use winhiip to transfer/install the game isos to a HDD (connected to your PC), but I found another program that can do this as well as send over Ethernet. Download HDL Dump GUI here
I used HDL Dump GUI to backup the ISOs from my IDE drive, and install them all to the new SATA drive with USB adaptors. Then for later games I want to add, I can just send them over Ethernet to OPL.

|
I also found a very good application to organise your ISOs, rename them to the correct name standards and download cover artwork to display in OPL.

|
The resulting ART folder can be placed on a USB stick and transferred to the PS2 HDD using uLaunchELF. You can also transfer OPL themes this way too.

|

|
So now we can see all the installed games in OPL with artwork and screenshots. All working perfectly on a SATA drive.
")
|
")
|
")
|
")
|
Thanks for reading.
If you have any questions, please leave a comment on this page, or send me an email – Contact
8bitplus 2018
This is a great guide and I’ve set up quite a few hard drives using your methods. The one thing I will say, you say “I used HDL Dump GUI to backup the ISOs from my IDE drive, and install them all to the new SATA drive with USB adaptors. Then for later games I want to add, I can just send them over Ethernet to OPL.”
I have never been able to get games to transfer over ethernet from the PC using OPL reliably. Installs would hang at 0%, or take hours and hours. To make things worse OPL decided to implement a new standard in the latest versions (NBD) which doesn’t seem to work on Windows at all.
Instead, I recommend everyone uses this software instead – https://sites.google.com/view/ysai187/home/projects/hdlgameinstaller
There’s a PS2 client and a PC server part and it works extremely well, works 100% under Windows 11 and transfers very quickly.
Hi. I completely agree. I can no longer get network transfers to work reliably. I reccomend rwmoving the hard drive from the ps2 and connecting to a SATA>USB Dock.
Too much hassle lol, seriously, try the tool I linked, it makes network transfer of games really easy 🙂
Hey is there any compatible 4tb with the free mcboot softmod
yes i just made some for customers 😀 check collectingames on etsy
Thanks man, really helpful.
Answer to “Twisted” you can install FHDBoot first. And then Free Mcboot later. As for the black screen when the console starts it may be because if your console has a matrix chip the FHDBoot or FreeMcboot conflict. I suggest to keep the start button pressed, turn on the console and wait for it to start. And then release it. I hope it helps
Hello, I recently just purchased a hard drive and Gamestar sata adapter. I don’t have a memory card with FMCB and can’t launch my PS2 with FHDB 100% of the time. I was able to boot successfully once in a while but it will often boot normally or freeze on a black screen. Do you know if the Gamestar requires that I have FMCB beforehand for it to notice my hard drive or is that even a thing? I know this isn’t the right place to ask but I can’t find anything anywhere that will solve my issue and was wondering if you had the same issue before.
Note: My PS2 is a 30001R model.
HI. Sorry I cannot answer that. All I know is that FMCB work perfectly off my memory card with my upgraded official HDD adapter.
Hi, if you bought that SATA adapter, don’t you just do a straight swap with the original network adapter? I thought it was just a straight plug and play rather than the dismantling and disconnecting you’ve done.
The kit I got was an upgrade kit for the original hdd adaptor. You can get the sata adaptors that plug and play but they often don’t have the LAN port and sometimes not as good quality as the sony units
Hi,
What HDD did you end up going with. I have everything except the HDD. I`m looking for something 2TB.
Good question. I did get a 1TB drive, but I cannot remember what drive model it was. Might possibly have been a Seagate.